So you want to know how to attach a TV mount to an RV wall.
It’s not as tough as you think it is. In fact, you can easily get it all set up with the right tools and techniques.
But some people do it wrong and fail to keep the TV mount securely positioned on the wall.
In this expert guide, you will learn just what it takes to attach your TV mount the correct way. This way, it can remain stable, secure, and safe – for your peace of mind.
Contents
How to Attach a TV Mount to An RV Wall – Things You Will Need
First, let us talk about tools and equipment.
Before we proceed to the steps, let us have a look at the different things you will need to hook up that TV mount the right way.
1. RV TV Mount
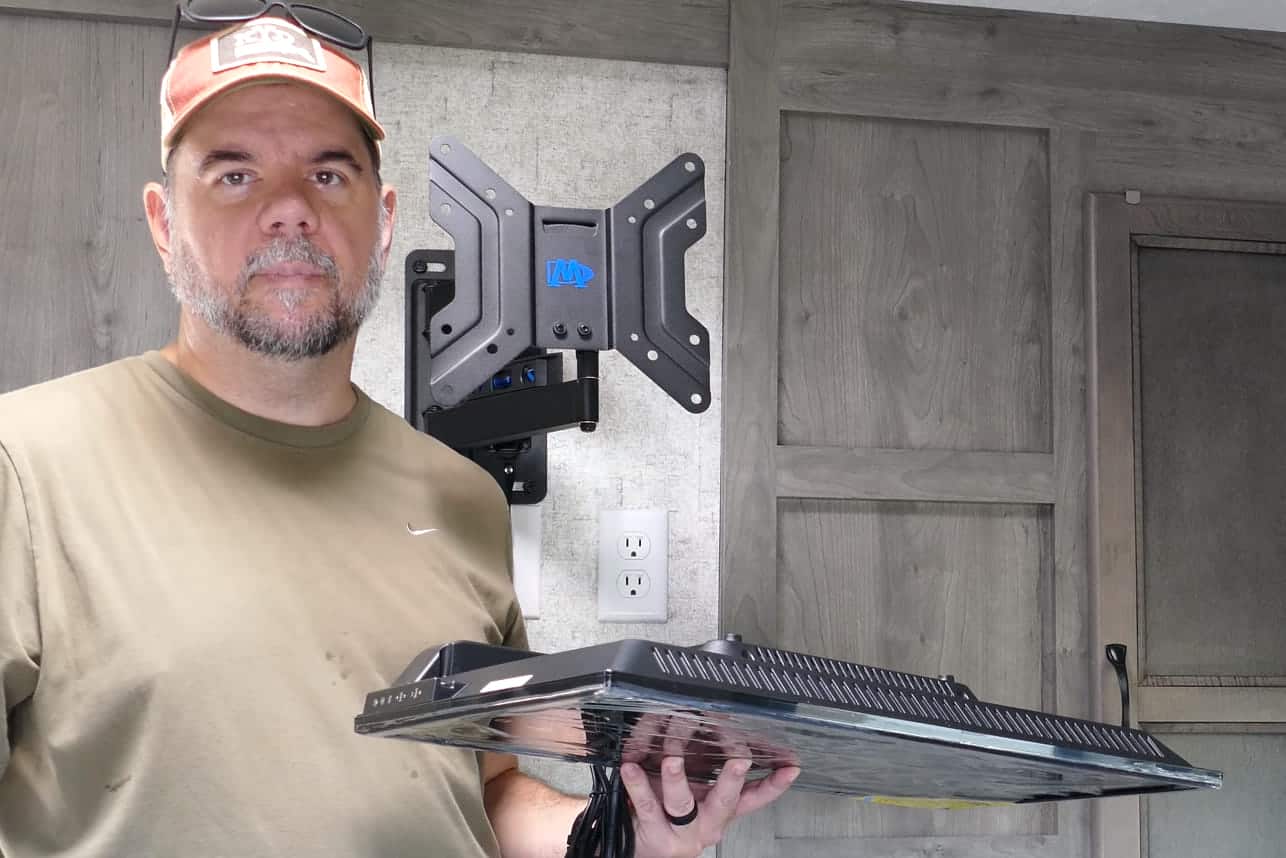
Of course, you need an RV TV mount. You may be wondering why it has to be one specifically-designed for an RV. Well, there are different TV mounts but an RV TV mount is the best to use for many reasons.
For instance, it is safe to use. When you want to leave the TV permanently mounted on the wall, then you need to make sure it will not wobble or vibration as the RV is on the move.
This is why an RV TV mount is best for this purpose. It comes with swivel arms that can be locked in place. The arms cradle the TV securely while in transmit and reduce risks of damage due to vibration.
Mainly, the lock is a must-have since it spares you from having to dismount the TV when traveling and put it back on when parked. This saves you time, energy, and even money since you can be sure your TV is better-protected with this type of mount.
2. Level
When mounting things on the wall, particularly a TV mount, it has to be the right position.
You also want to avoid drilling so many holes. If you don’t use a level, you may end up drilling on the wrong position, then drill a few more holes until your wall is less than perfect to look at!
So, do it right the first time and measure correctly with a level.
Avoid relying on your eyes alone since you can never be too sure with the accuracy of your drilling. Most importantly, you would not want your TV to end up being crooked on the wall, right?
3. Drill and Drill Bits
Naturally, you need a power drill that allows you to screw the mount onto the wall.
A power drill cuts the amount of time and energy in half unlike when you’re using a conventional screw driver. Plus, you can make precise drill holes onto the wall in just seconds.
We recommend that you have some masonry bits for this task, along with some Philips head bits. Thus, you will be able to drive your mounting screws firmly and perfectly in place.
4. Stud Finder
Some folks pass on this one. But what they do not understand is just how important this tool is.
What a stud finder does is it allows you to determine the favorable spots in the wall that offers the optimal support for your TV.
Keep in mind that the wall surface of your RV does not suffice when you want to achieve ample support. So, it has to be the perfect spot, which will be able to hold the TV’s weight and ensure your safety, as well.
5. Optional Items
We did not include the items below in the absolute necessities because you can do away with them.
However, for the purpose of giving you options, we have decided to list them down just in case you find them essential for the installation process.
Screw adhesives, for instance, offer extra stability. Even after placing the screws down and securing them, you might want to add something more to keep them stable using screw adhesives.
Since your RV moves a lot while in transit, you can never say no to additional support for your TV mount.
Also, a cable cover offers a nice touch after all the installation is done. After all, who would want to have a ton of cables dangling around when you already have so little space in your RV?
Thus, a cable cover puts all the cables neatly in place. Tuck them all nicely behind your table, interior decor… No mess, no fuss!
And lastly, you can use a painter’s tape to mark the area on the wall after working with your stud finder. This type of tape allows you to see the area more quickly without leaving a nasty mark on your pristine RV wall.
Read More: Comprehensive Guide on How To Build Rv Cabinets Like an Expert!
7 Easy Steps on How to Attach a TV Mount to an RV Wall

Now, you are ready to know how to attach a TV mount to an RV wall.
So, let’s get to work and follow these 7 steps that never fail!
1. Get your tools ready.
In the previous section, we have enumerated all the basic and optional tools you will use for attaching the TV mount to your wall.
Have them all within your reach, then you can move on to the next step.
2. Determine the right position of your TV mount.
This is a crucial, yet important step in attaching the TV mount to the wall.
Use a level to check the correct positioning that works for your needs. Determine the height, which directly impacts the viewing angle.
It does not matter if you have an adjustable mount; you still want to make sure that the optimal viewing angle is achieved. Adjusting the angle using the mount only offers a limited means of lowering or raising it.
So, do it correctly by measuring the right height and use a level to make sure it is absolutely fine.
3. Get the stud finder to work.
We mentioned previously the importance of having additional support on the wall by using a stud finder.
Now, you should get that nifty little tool to work and identify the wall studs. This way, you can determine for certain where you should mount the TV.
Let the stud finder do the locating by hovering it to the wall. Then, mark the spot with either a painter’s tape (less messy) or a good ol’ pencil.
Some stud finders may even have functionalities that allow you to locate any plumbing or electrical wiring behind your wall. If yours has this feature, great! This spares you from accidentally drilling a hole on your electrical wires, which is a serious safety hazard.
4. Pre-drill the right areas.
Now that you have those areas marked, you can start drilling. Use the correct drill bit and be sure to drill the specific locations only.
This step involves pre-drilling the hole. Before you go all-in, simply mark the right spots with a suitable masonry bit. Then, you can push the screws in without cracking your wall.
5. Start installing.
With the holes all in place, you are ready to install your mounting bracket.
Hold firmly the TV mount against the wall. Then, drill securely the mounting screws right into those pre-drilled holes.
6. Attach the mounting plate and your TV.
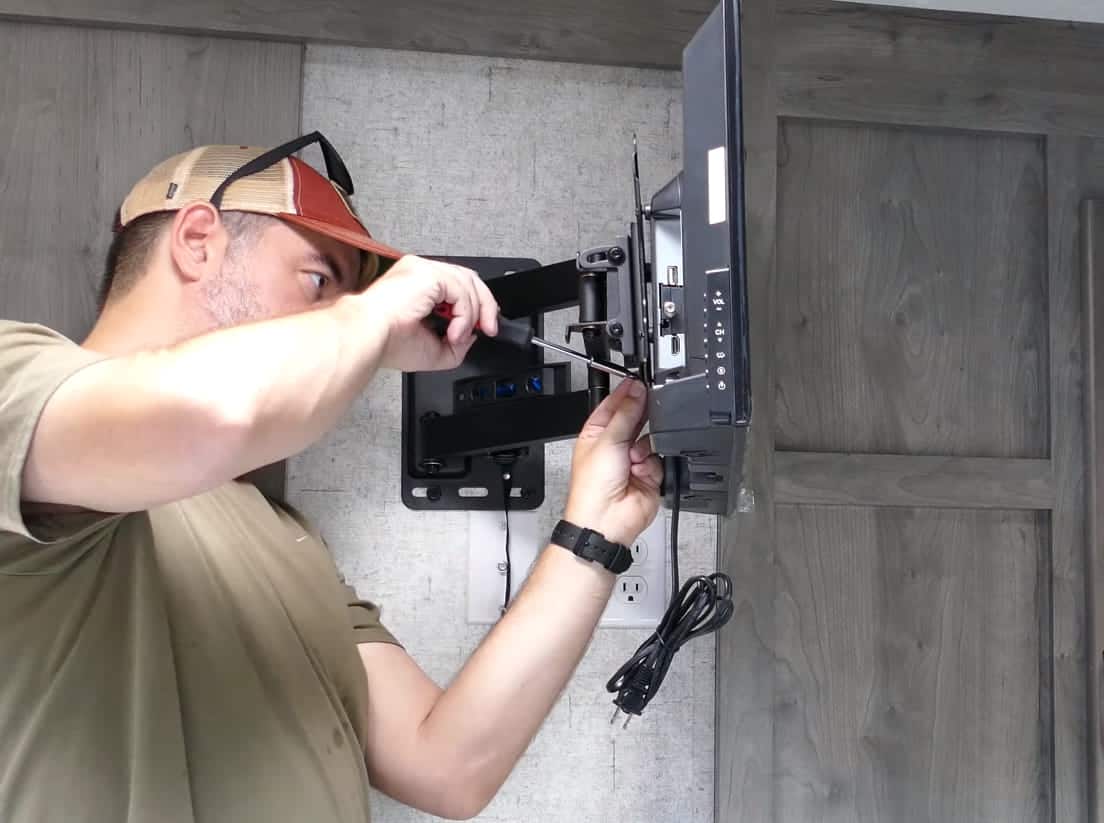
Check the back of your TV for the holes designated for the mounting plate attachment. Once you have discovered this, you can secure the plate using the appropriate hardware, which is usually included in the package.
And at this time, you can grab your TV, align the plate with the designated wall bracket, then securely connect them.
There are various mounting designs, which makes things trickier. So, be sure to follow your manufacturer’s directions for the correct mounting process.
7. Do some finishing touches.
Congratulations! You have just attached your TV mount correctly.
Now, you’re ready to make some finishing touches to further enhance your viewing experience.
Hook your TV up to your RV antenna. Or, if you use a satellite TV, then you can connect it to your RV. It’s even easier with a smart TV, since you only need to set it up using your W-Fi.
Final Thoughts
Knowing how to attach a TV mount to an RV wall is a great cost-effective way to set up this device.
Since you can do it yourself, you no longer have to hire someone to do it for you.
Just make it a point to do it correctly and securely by using the right tools, as well as the techniques we have shared in this post.
So, get those materials ready, follow these steps, and you’re ready to start hooking your TV up onto the RV wall just like a pro!


